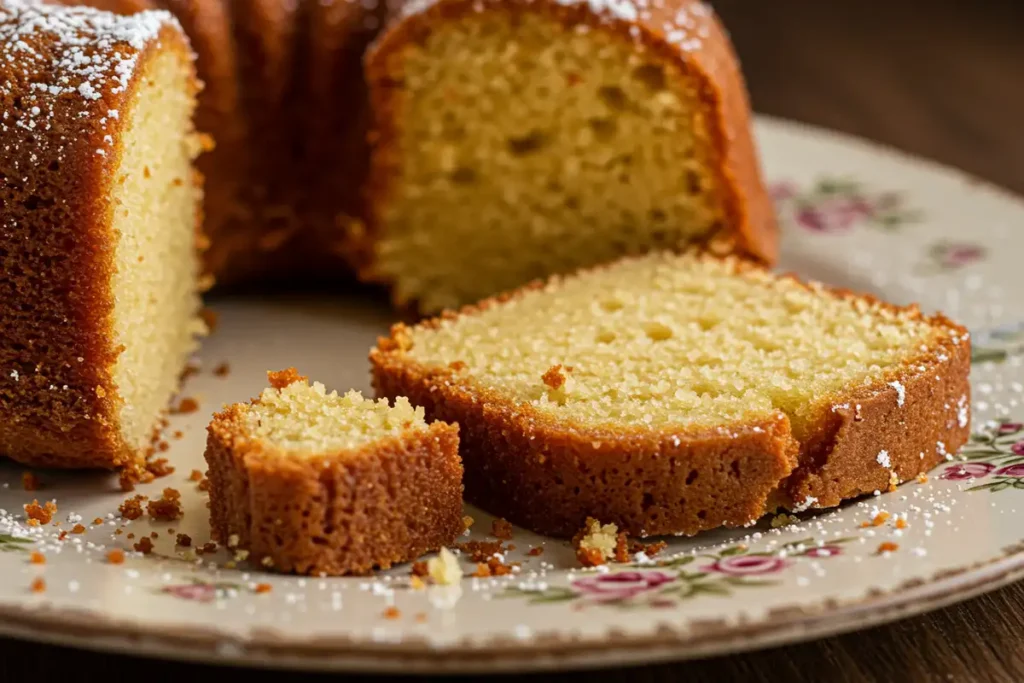
Okay, amici, gather ’round because we need to talk about a cake. Not just any cake, but a pound cake so ridiculously good, so buttery and perfect, it has a name that makes you blush and chuckle all at once. Yep, we’re diving into the gloriousness that is the “Slap Ya Momma Pound Cake”! Now, don’t get any ideas – we love our moms! It’s just that classic Southern way of saying something tastes unbelievably delicious. The first time my goofy husband heard the name, he quipped, “Does it come with an apology card?” (Bless his heart). But honestly, one bite, and even my picky eater son asks for “more of that yummy yellow cake,” while my little chatterbox daughter tries to sneak finger swipes of the batter. It’s that good. Pure comfort, pure buttery bliss.
Trust me, this isn’t just hype. This pound cake is the real deal – rich, moist, dense yet tender, with that perfect golden crust. Nonna always said the best baking comes from the heart (and good butter!), and this cake proves her right. Whether you’re a baking pro or just starting out, this “Slap Ya Momma Pound Cake” recipe is surprisingly straightforward. I’ll hold your hand through it, share my secrets, and we’ll bake up something truly special. Ready to make some magic?
What Makes Slap Ya Momma Pound Cake So Darn Good?
So, what’s the secret? Why does this particular pound cake earn such a wild name and rave reviews? It’s not just one thing, honey, it’s a whole lotta love and the right combination of simple, quality ingredients treated with respect.
Here’s the lowdown on why this Slap Ya Momma Pound Cake is pure gold:
- Butter is Queen: Hello, it’s pound cake! We’re not messing around here. Good quality, real butter is non-negotiable. It brings the flavor, the richness, and that melt-in-your-mouth texture. Use the good stuff!
- Sugar, Sugar: Yep, there’s a good amount. Sugar does more than just sweeten; it helps keep the cake moist and contributes to that tender crumb and beautiful golden crust.
- Eggs-cellent Structure: Eggs are the workhorses here, providing richness from the yolks, moisture, and the structure needed to hold everything together.
- Flour Power: Good old all-purpose flour provides the sturdy base for this glorious cake. Nothing too fancy needed.
- The Moisture Maker (Maybe a Secret?): Many legendary Slap Ya Momma Pound Cake recipes swear by adding sour cream or even cream cheese. It adds a subtle tang and guarantees an ultra-moist cake. This version uses milk, but feel free to experiment with sour cream!
- Patience, Grasshopper: This isn’t a rush job. Taking the time to properly cream the butter and sugar until it’s light and fluffy is key . So is mixing gently and baking it low and slow. Good things come to those who wait (and bake patiently!).
Understanding how these simple ingredients create such a perfect texture is part of the fun of baking! If you want to geek out on the science behind tender, buttery pound cake, the folks at Serious Eats have a great article that breaks it down.
Let’s Get Baking: Slap Ya Momma Pound Cake Recipe
Alright, apron on? Kitchen dance party playlist ready? Let’s bake this amazing Slap Ya Momma Pound Cake! Don’t be intimidated; it’s easier than you think.
Yields: One gorgeous loaf (about 10-12 servings)
Prep time: 20 minutes (mostly creaming time!)
Cook time: 60-75 minutes (patience, remember?)
Ingredients You’ll Need
- 1 cup (2 sticks) unsalted butter, softened (Let it sit out! Cold butter = sad cake)
- 3 cups granulated sugar (Yes, three cups. Trust the process!)
- 6 large eggs (Room temperature is best, helps them mix in smoothly)
- 3 cups all-purpose flour (Just regular AP flour works perfectly)
- 1/2 teaspoon baking powder (Just a little lift)
- 1/4 teaspoon salt (Balances all that sweetness)
- 1 cup milk (Whole milk is great, but 2% works too. Or swap for sour cream!)
- 1 teaspoon vanilla extract (Use pure vanilla, not the imitation stuff!)
Essential Kitchen Tools
- 9×5 inch loaf pan (Standard loaf pan size)
- Mixing bowls (A big one for the batter, a medium one for dry ingredients)
- Electric mixer (Handheld or stand mixer HIGHLY recommended for proper creaming!)
- Measuring cups and spoons (Accuracy is your friend in baking)
- Wire rack (For cooling that beautiful cake)
Step-by-Step Instructions (Let’s Bake!)
- Get Ready: Crank up that oven to 325°F (160°C). Now, prepare your loaf pan like a pro: grease it generously with butter or non-stick spray, then dust it lightly with flour, tapping out any excess. This ensures your gorgeous cake doesn’t stick!
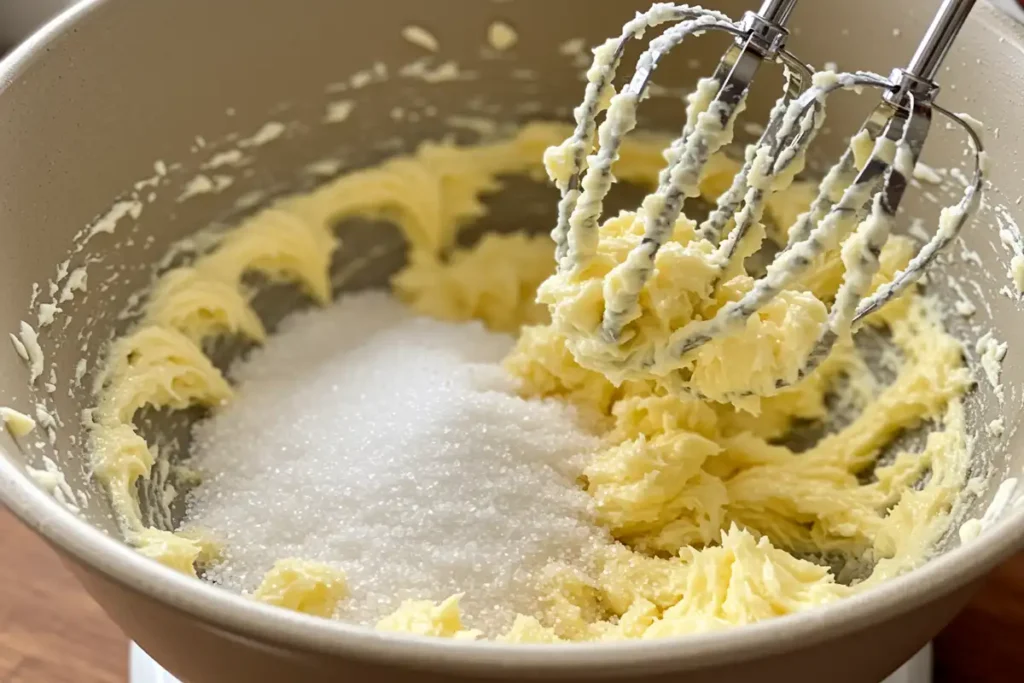
- Cream Like Crazy: In your large mixing bowl, grab that softened butter and the sugar. Now, beat ’em together with your electric mixer on medium-high speed. And I mean BEAT! Go for at least 5 minutes, scraping down the sides of the bowl occasionally. You want it super light, pale, and fluffy. This step is CRUCIAL for a tender cake – don’t skimp! Getting this right is one of the essential techniques for a moist cake.
- Egg Time: Turn the mixer down to medium-low. Add the eggs one at a time, making sure each one is fully mixed in before adding the next. Scrape the bowl again after the last egg.
- Dry Team Assemble: In your separate medium bowl, whisk together the flour, baking powder, and salt. This just helps distribute everything evenly.
- Alternate Attention: Okay, now pay attention! With the mixer on low speed, add about a third of the dry ingredients to the butter mixture. Once it’s mostly combined, add about half of the milk (or sour cream). Then another third of the dry ingredients, then the rest of the milk, and finally, the last third of the dry ingredients. Mix just until each addition is combined. Seriously, stop mixing as soon as you don’t see streaks of flour. Overmixing = tough cake!
- Vanilla Kiss: Gently stir in the vanilla extract.
- Into the Pan: Pour the thick, luscious batter into your prepared loaf pan. Gently spread it evenly with a spatula.
- Low and Slow Bake: Pop that pan into the preheated oven. Now, patience! Bake for 60-75 minutes. Check around the 60-minute mark. A wooden skewer (like a toothpick or bamboo skewer) inserted into the very center should come out clean, with no wet batter clinging to it. If it’s still wet, give it another 5-10 minutes and check again.
- Cool Your Jets: Once baked, let the cake cool in the pan on a wire rack for about 10-15 minutes. Then, carefully run a thin knife around the edges and invert the cake onto the wire rack to cool completely. Don’t rush this! Slicing a warm pound cake can lead to crumbling sadness.
Pro Tips for Slap Ya Momma Pound Cake Success
Want to nail this Slap Ya Momma Pound Cake on the first try? Listen up, I’ve learned a few things making pound cakes over the years (some the hard way!):
- Room Temp is Your BFF: I know I mentioned it, but seriously, let your butter and eggs sit out on the counter for at least 30-60 minutes before you start. They combine so much better when they’re not ice cold. Trust me.
- Creaming Isn’t Just Mixing: When I say cream the butter and sugar for 5+ minutes, I mean it! You’re whipping air into the fat, which creates tiny pockets. These pockets expand in the oven, giving the cake its fine, tender texture. It’s science you can taste!
- Mixer on LOW for Alternating: When you’re adding the dry and wet ingredients, keep that mixer speed low, low, low. Mix just enough to incorporate. Overworking the flour develops gluten, and gluten makes cakes tough, not tender. Be gentle!
- Know Your Oven: Ovens can be quirky! Yours might run hot or cool. The 60-75 minute bake time is a guideline. Start checking early, and rely on the skewer test, not just the clock. The cake should be beautifully golden brown.
- Clean Skewer is Key: When you do the skewer test, make sure you go right into the center. If it comes out totally clean or with just a few dry crumbs, you’re golden. Wet batter means it needs more time.
Variations to Make It Your Own
This classic Slap Ya Momma Pound Cake is perfection on its own, but hey, sometimes you wanna shake things up! Here are some fun twists:
- Lemon Zing: Add the grated zest of 1 large lemon (or 2 small) to the creamed butter and sugar. You can also replace a couple of tablespoons of the milk with fresh lemon juice for extra tang.
- Chocolate Chip Delight: Gently fold in 1 cup of semi-sweet or milk chocolate chips after the batter is fully mixed, right before pouring into the pan.
- Marble Magic: After mixing the batter, scoop out about 1/3 of it into a separate small bowl. Stir in 3-4 tablespoons of unsweetened cocoa powder (maybe dissolved in a tiny bit of hot water first). Dollop the plain and chocolate batters alternately into the loaf pan, then gently swirl with a knife before baking.
- Get Glazy: Once the cake is completely cool, whisk together 1 cup of powdered sugar with 2-3 tablespoons of milk, lemon juice, or even orange juice until smooth. Drizzle that glaze all over the top. Mamma mia! If you like glazes, you might also enjoy my Country Apple Fritter Bread which has a lovely one.
Go wild! Baking is about creativity too. Make this Slap Ya Momma Pound Cake your own masterpiece!
Slap Ya Momma Pound Cake
Ingredients
- 1 cup 2 sticks unsalted butter, softened
- 3 cups granulated sugar
- 6 large eggs
- 3 cups all-purpose flour
- ½ teaspoon baking powder
- ¼ teaspoon salt
- 1 cup milk or sour cream, for a tangier flavor
- 1 teaspoon vanilla extract
Instructions
- Preheat: Preheat oven to 325°F (160°C). Grease and flour a 9×5 inch loaf pan.
- Cream Butter and Sugar: In a large mixing bowl, cream together the softened butter and sugar until light and fluffy. Beat for at least 5 minutes.
- Add Eggs: Beat in the eggs one at a time, mixing well after each addition.
- Combine Dry Ingredients: In a separate bowl, whisk together the flour, baking powder, and salt.
- Alternate Wet and Dry Ingredients: Gradually add the dry ingredients to the wet ingredients, alternating with the milk (or sour cream), beginning and ending with the dry ingredients. Mix until just combined. Do not overmix!
- Add Vanilla: Stir in the vanilla extract.
- Pour into Pan: Pour the batter into the prepared loaf pan and spread evenly.
- Bake: Bake for 60-75 minutes, or until a wooden skewer inserted into the center comes out clean.
- Cool: Let the cake cool in the pan for 10 minutes before inverting it onto a wire rack to cool completely.
Notes
- Use Room Temperature Ingredients: Ensure butter and eggs are at room temperature.
- Cream the Butter and Sugar Properly: Beat until light, fluffy, and almost white.
- Don’t Overmix: Mix just until the ingredients are combined.
- Bake Low and Slow: Prevents drying out and cracking.
- Check for Doneness: Use a wooden skewer.
Answering Your Burning Pound Cake Questions
Got questions buzzing around your head like bees near my oregano plant? Let’s tackle some common pound cake queries:
Why is it called Slap Ya Momma Pound Cake?
Ha! It’s just a funny, old-school Southern saying. It doesn’t mean you should *actually* slap anyone, especially not your mom! It just means the cake is SO incredibly delicious, so comforting and satisfying, it evokes that feeling of home-cooked perfection that’s ‘slap ya momma good.’ It’s a compliment, really!
What makes a good pound cake?
For me, a truly great pound cake has a few key things: intense buttery flavor (non-negotiable!), a moist, fine crumb (not dry or crumbly), a lovely dense-but-tender texture (it should feel substantial, not airy like sponge cake), and a beautiful golden-brown crust. Simple perfection!
Can I freeze-pound cake?
Absolutely! Pound cake freezes like a dream. Once it’s completely cool, wrap the whole loaf (or individual slices) tightly in plastic wrap, then wrap it again in aluminum foil or pop it into a freezer bag. It’ll keep beautifully for up to 3 months. Just thaw it overnight in the fridge or on the counter when you’re ready for a treat.
How do you keep pound cake moist?
Once it’s totally cool, the key is airtight storage! Keep it in an airtight container or cake dome at room temperature for 3-4 days. You can also wrap it well in plastic wrap. If it lasts longer than that (unlikely in my house!), you can store it in the fridge, but be aware the fridge can sometimes dry cakes out a bit faster. For more great tips on storing pound cake, King Arthur Baking has some helpful advice alongside their own classic recipe.
The Grand Finale: Prepare to Be Amazed!
This Slap Ya Momma Pound Cake isn’t just dessert, folks, it’s a little slice of heaven. It’s the kind of cake that makes memories, the kind that disappears lightning-fast at potlucks, the kind that makes my whole family happy (a true feat!). It’s pure, buttery indulgence, baked with love.
So, what are you waiting for? Preheat that oven, cream that butter, and get ready to bake a cake that truly lives up to its legendary name. And remember, the most important ingredient is always love (and maybe an extra pat of butter!). Let me know how yours turns out in the comments below – I love hearing your baking adventures! Buon appetito!


