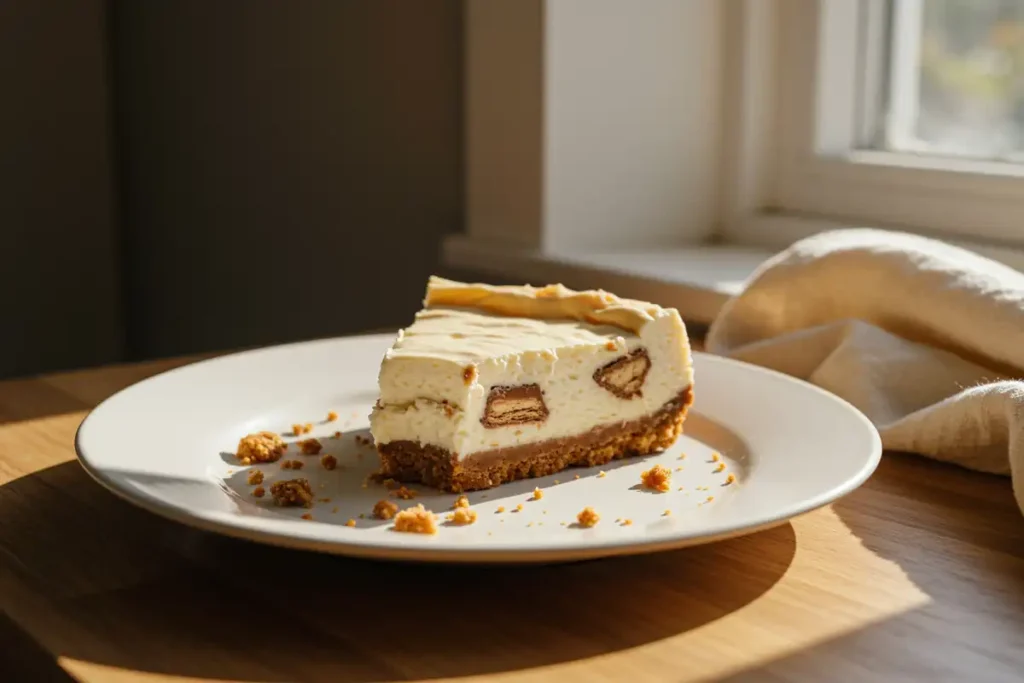
Hey there, cheesecake lovers! Ever find yourself craving something decadent but also ridiculously easy to make? Well, buckle up, buttercup, because I’ve got the recipe that’s about to become your new obsession: Aero Bar Cheesecake. This isn’t your grandma’s cheesecake (unless your grandma is seriously cool and into bubbly chocolate!).
What makes this cheesecake so special? It’s all about the magic of Aero bars – those delightfully aerated chocolate bars that just melt in your mouth. Now, imagine that airy chocolate goodness swirled into a creamy cheesecake filling, all nestled on a buttery biscuit base. Sounds divine, right? Trust me, it is!
This recipe is perfect for those days when you want to impress without spending hours in the kitchen. Plus, it’s a no-bake wonder, which means no stressing about cracks or uneven baking. Ready to dive in? Let’s do this!
Why Aero Bar Cheesecake is a Game-Changer
Okay, let’s break down why this Aero Bar Cheesecake is about to become your go-to dessert. I’m not exaggerating when I say this is a total game-changer.
- Effortless Elegance: This cheesecake looks and tastes like you spent hours slaving away, but in reality, it’s incredibly simple to make. It’s like wearing sweatpants but telling everyone they’re “relaxed fit trousers.”
- No-Bake Bliss: Forget about preheating your oven and worrying about water baths. This recipe is entirely no-bake, making it perfect for hot summer days or when you just can’t be bothered with baking.
- Aero Bar Magic: The star of the show, Aero bars, bring a unique bubbly texture and rich chocolate flavor that takes this cheesecake to the next level. It’s a bit like a chocolatey cloud in every bite.
- Customizable: Want to switch things up? This recipe is super versatile. You can add different toppings, use different types of biscuits for the base, or even swirl in some caramel sauce for extra indulgence.
- Crowd-Pleaser: Whether you’re hosting a dinner party or just want to treat yourself, this cheesecake is guaranteed to be a hit. Everyone loves cheesecake, and the addition of Aero bars makes it extra special.
So, why should you try this recipe? Because it’s fun, easy, and incredibly delicious. It’s a little slice of happiness that you can whip up in no time. Now, let’s get into the nitty-gritty!
Gathering Your Ingredients: The Aero Bar Cheesecake Lineup
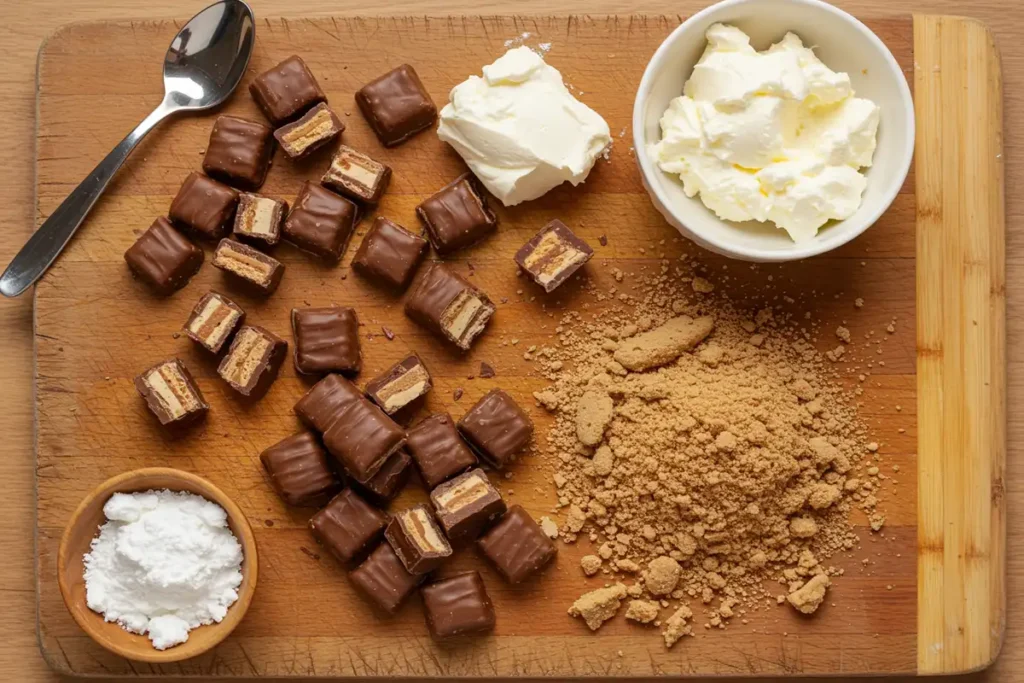
Before we start creating this masterpiece, let’s make sure we have all our ingredients ready. Here’s what you’ll need:
- For the Base:
- 250g Digestive Biscuits (or Graham Crackers if you’re in the US)
- 100g Unsalted Butter, melted
- For the Filling:
- 600g Cream Cheese, softened (full-fat works best for that creamy texture)
- 100g Icing Sugar (also known as powdered sugar)
- 300ml Double Cream (heavy cream for our American friends)
- 4 x Aero Bars (around 36g each), roughly chopped
- 1 tsp Vanilla Extract (because everything is better with vanilla!)
- Optional Toppings:
- Extra Aero Bar pieces
- Chocolate shavings
- Whipped cream
Pro Tip: Make sure your cream cheese is properly softened. This will ensure a smooth and lump-free filling. Nobody wants lumpy cheesecake!
Now, let’s talk about substitutions. If you’re gluten-free, you can easily use gluten-free digestive biscuits. For a lower-fat option, you can use light cream cheese, but be aware that it might affect the overall texture. And if you’re feeling adventurous, try adding a tablespoon of cocoa powder to the base for a chocolatey twist.
Step-by-Step: Crafting Your Aero Bar Cheesecake
Alright, let’s get our hands dirty! Follow these easy steps to create your own Aero Bar Cheesecake masterpiece:
- Crush the Biscuits: Place the digestive biscuits in a large resealable bag and crush them into fine crumbs. You can use a rolling pin or a food processor for this. I personally enjoy the rolling pin method – it’s a great stress reliever!
- Mix the Base: In a bowl, combine the biscuit crumbs with the melted butter. Mix well until the crumbs are evenly coated. The mixture should resemble wet sand.
- Press into the Tin: Press the biscuit mixture into the base of a 20cm (8-inch) springform tin. Use the back of a spoon to create an even and compact layer. This will be the foundation of your delicious cheesecake, so make sure it’s solid!
- Make the Filling: In a large bowl, beat the softened cream cheese and icing sugar together until smooth and creamy. I like to use an electric mixer for this, but you can also do it by hand if you’re feeling strong!
- Whip the Cream: In a separate bowl, whip the double cream until it forms soft peaks. Be careful not to overwhip it, or you’ll end up with butter! (Although, let’s be honest, butter is never really a bad thing.)
- Combine and Fold: Gently fold the whipped cream into the cream cheese mixture. Add the vanilla extract and the chopped Aero bars. Mix until everything is well combined, but be careful not to overmix – we want to keep those lovely air bubbles!
- Pour and Chill: Pour the filling over the biscuit base, spreading it evenly. Cover the tin with cling film and refrigerate for at least 4-6 hours, or preferably overnight. This will allow the cheesecake to set properly and the flavors to meld together.
- Decorate and Serve: Once the cheesecake is set, carefully remove it from the springform tin. Decorate with extra Aero bar pieces, chocolate shavings, or whipped cream. Slice and serve!
Technical Term Alert: A springform tin is a type of baking pan that has a removable base and sides, making it easy to release your cheesecake without damaging it. It’s a must-have for any serious cheesecake enthusiast!
Variations and Tips for the Perfect Aero Bar Cheesecake
Want to take your Aero Bar Cheesecake to the next level? Here are some variations and tips to help you create the perfect dessert:
- Caramel Swirl: Drizzle some caramel sauce over the biscuit base before adding the filling. This will add a delicious caramel layer to your cheesecake.
- Chocolate Base: Add a tablespoon of cocoa powder to the biscuit base for a chocolatey twist. You can also use chocolate digestive biscuits for an extra rich flavor.
- Mint Aero Cheesecake: Use Mint Aero bars instead of regular Aero bars for a refreshing minty flavor.
- Salted Caramel: Use salted caramel chocolates for an extra luxurious touch.
- Nutty Base: Chop some nuts and add them into the biscuit base for a different texture and taste.
- Berry Topping: Top your cheesecake with fresh berries for a burst of fruity flavor.
- Espresso Shot: Use a shot of cooled espresso in the filling for a coffee cheesecake.
- Mini Cheesecakes: Make the recipe in smaller portion-sized tins for individual treats.
- Dietary Needs: Gluten-free digestive biscuits can easily be swapped in, and light cream cheese can be used, but it might compromise the texture.
Tips for Success:
- Softened Cream Cheese: Make sure your cream cheese is properly softened to avoid lumps in your filling.
- Chilling Time: Don’t rush the chilling process. The longer you chill the cheesecake, the better it will set.
- Gentle Folding: When folding the whipped cream into the cream cheese mixture, be gentle to avoid deflating the cream.
- Presentation: Get creative with your toppings! A little bit of decoration can go a long way in making your cheesecake look extra special.
Aero Bar Cheesecake: Dreamy & Easy Recipe!
Ingredients
For the Base:
- 250 g Digestive Biscuits or Graham Crackers
- 100 g Unsalted Butter melted
For the Filling:
- 600 g Cream Cheese softened (full-fat recommended)
- 100 g Icing Sugar Powdered Sugar
- 300 ml Double Cream Heavy Cream
- 4 x Aero Bars around 36g each, roughly chopped
- 1 tsp Vanilla Extract
Optional Toppings:
- Extra Aero Bar pieces
- Chocolate shavings
- Whipped cream
Instructions
- Crush the Biscuits: Place the digestive biscuits in a large resealable bag and crush them into fine crumbs.
- Mix the Base: In a bowl, combine the biscuit crumbs with the melted butter. Mix well until evenly coated.
- Press into the Tin: Press the biscuit mixture into the base of a 20cm (8-inch) springform tin. Use the back of a spoon to create an even and compact layer.
- Make the Filling: In a large bowl, beat the softened cream cheese and icing sugar together until smooth and creamy.
- Whip the Cream: In a separate bowl, whip the double cream until it forms soft peaks.
- Combine and Fold: Gently fold the whipped cream into the cream cheese mixture. Add the vanilla extract and the chopped Aero bars. Mix until well combined but avoid overmixing.
- Pour and Chill: Pour the filling over the biscuit base, spreading it evenly. Cover the tin with cling film and refrigerate for at least 4-6 hours, or preferably overnight.
- Decorate and Serve: Once the cheesecake is set, carefully remove it from the springform tin. Decorate with extra Aero bar pieces, chocolate shavings, or whipped cream. Slice and serve!
Notes
- Softened Cream Cheese: Essential for a smooth filling.
- Chilling Time: Don’t rush it! Longer chilling time results in a better set.
- Gentle Folding: Avoid deflating the whipped cream by folding gently.
- Springform Tin: A must-have for easy cheesecake removal.
- For an even more delicious base, add a shot of espresso to it or use digestive biscuits with chocolate
Frequently Asked Questions About Aero Bar Cheesecake
Got questions? I’ve got answers! Here are some frequently asked questions about making Aero Bar Cheesecake:
Can I use a different type of chocolate bar?
Absolutely! While Aero bars are the star of this recipe, you can easily substitute them with other chocolate bars like Dairy Milk, Snickers, or even Kit Kat.
Can I freeze this cheesecake?
Yes, you can freeze Aero Bar Cheesecake. Wrap it tightly in cling film and then in foil. It will keep in the freezer for up to 2-3 months. Thaw it in the refrigerator overnight before serving.
How long does this cheesecake last in the fridge?
Aero Bar Cheesecake will last in the fridge for up to 3-4 days. Make sure to store it in an airtight container to prevent it from drying out.
Can I make this recipe vegan?
Yes, you can make a vegan version of this cheesecake by using vegan cream cheese, vegan biscuits, and vegan chocolate. There are plenty of great vegan alternatives available these days!
What can I use instead of Digestive Biscuits?
If you can’t find digestive biscuits, graham crackers or any similar sweet biscuit will work perfectly.
What if my cheesecake is too soft?
If your cheesecake is too soft, it probably hasn’t chilled for long enough. Give it a few more hours in the fridge to set properly. If it’s still too soft, you may have overmixed the filling, which can cause it to lose its structure.
Can I add gelatin to this recipe?
While this recipe doesn’t require gelatin, you can add a teaspoon of gelatin to the whipped cream for a firmer set. This is especially useful if you live in a warmer climate.
What equipment do I need to make the Aero Bar Cheesecake?
You will need the following equipment: a springform pan, a mixing bowl, a whisk or electric mixer, cling film or an airtight container.
Time to Bake!
So there you have it – everything you need to create your own Aero Bar Cheesecake masterpiece. This recipe is fun, easy, and incredibly delicious. Whether you’re a seasoned baker or a complete novice, you’ll be able to whip up this cheesecake in no time.
Remember, cooking should be fun, so don’t be afraid to experiment and put your own spin on this recipe. And most importantly, enjoy every bite! Happy baking, my friends!


