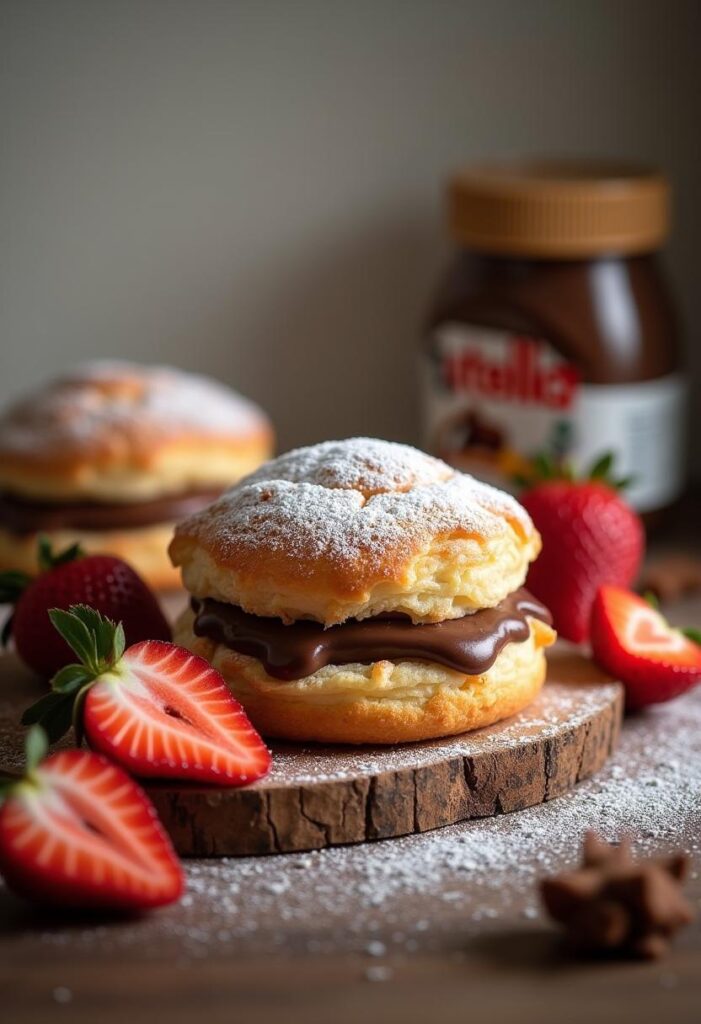
Okay, picture this: It’s one of those chaotic Portland mornings. Rain drumming on the roof, my ten-year-old refusing anything that isn’t beige, my six-year-old chattering non-stop about unicorns, and my lovely husband trying (bless his heart) to lighten the mood with a history pun that absolutely tanks. What’s a slightly frazzled Mamma to do? Reach for the puff pastry and Nutella, that’s what! Seriously, is there a faster way to inject pure, unadulterated joy into a day? Mamma mia! This Nutella Pastry Puff recipe is my secret weapon – looks fancy, tastes like a dream, but honestly? It’s so easy, you’ll feel like you cheated. My husband calls them “happiness pockets,” and even my picky little pasta fiend can’t resist ’em.
Stick with me, amici! I’m gonna spill all the secrets – finding the good puff pastry (store-bought is my BFF here, zero shame!), getting that perfect Nutella ooze without a kitchen catastrophe, fun ways to mix things up, and how to fix any little oopsies. Nonna always said the best food comes from the heart, shared with love. So, consider this my little offering from my slightly chaotic kitchen to yours. Ready to bake up some magic?
Why Nutella Pastry Puff is a Must-Try?
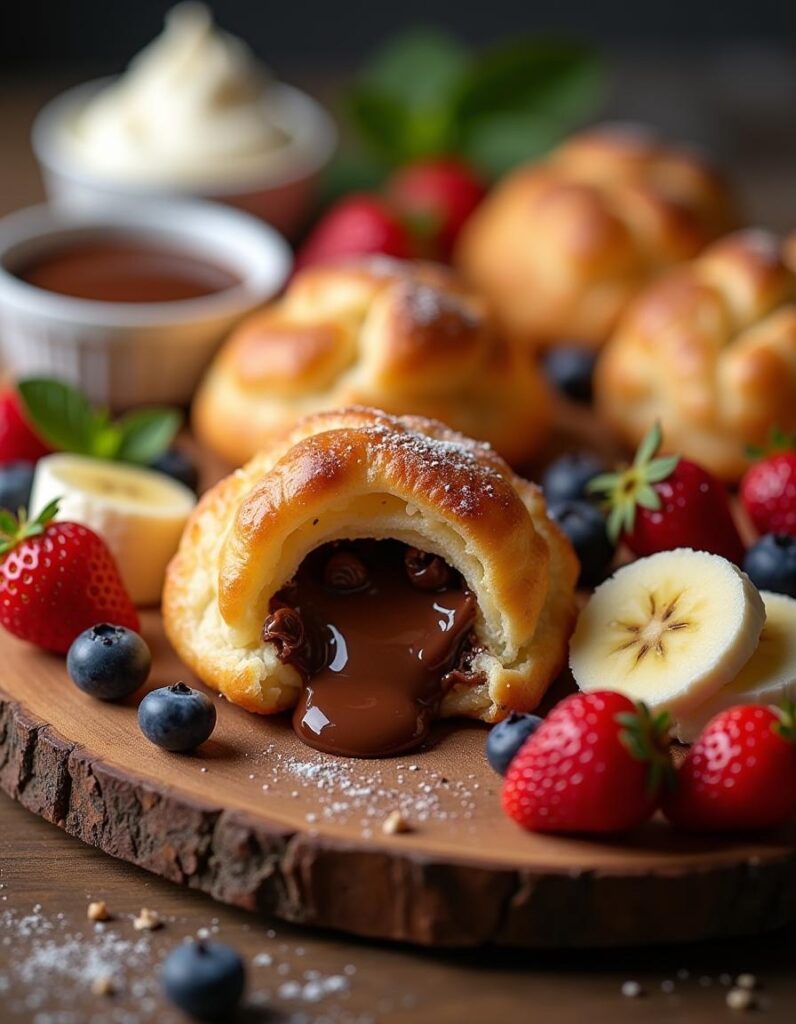
Listen, if you’re still on the fence, just imagine biting into a warm, shatteringly crisp cloud of buttery pastry, only to find a molten river of glorious Nutella waiting inside. Chef’s kiss . These Nutella Pastry Puff treats are pure comfort gold, folks. They’re perfect for lazy weekend mornings (hello, instant hero status!), a fun after-school snack that disappears in seconds, or even a simple, elegant dessert that makes everyone feel a little fancy after dinner.
And the best part? They look way more complicated than they are. No kidding, the elegance-to-effort ratio here is seriously impressive! Grab some decent store-bought puff pastry (because life’s too short to laminate dough on a Tuesday, right?) and that iconic jar of hazelnut happiness, and you’re basically halfway to wowing everyone. No pastry school diploma needed, promise!
Plus, they’re ridiculously fun to customize. Feeling fruity? Toss in some banana slices – a classic! Got some nuts hanging around? A sprinkle of chopped hazelnuts takes it next level. It’s one of those recipes that turns baking from a chore into a fun little kitchen dance party (cue the Sinatra!).
So, if you need that perfect little something that ticks all the boxes – easy, impressive, and tastes like a warm hug – look no further. These Nutella Pastry Puffs are IT. Let’s get baking!
The Magic of Puff Pastry and Nutella
Puff pastry and Nutella – seriously, it’s like they were made for each other, a true culinary power couple. That light, airy, buttery pastry with its zillion flaky layers is just begging to cradle something rich and wonderful. And what’s richer or more wonderful than Nutella? When they bake together, magic happens. The pastry gets shatteringly crisp and golden, puffing up like a proud peacock, while the Nutella inside turns into this warm, gooey, utterly irresistible river of chocolate-hazelnut bliss. It’s alchemy, I tell ya!
What I adore most is how easygoing this combo is. Puff pastry is pretty chill; it gets along with almost anything. But pair it with Nutella? Forget about it. Instant indulgence, a little bite of luxury that takes practically zero effort. And let’s be honest, we all deserve that little shortcut to deliciousness sometimes.
It’s all about that incredible contrast – the delicate crunch of the pastry giving way to the smooth, sweet creaminess of the Nutella. Whether you serve them piping hot from the oven (careful, that filling is basically delicious lava!) or let them cool down a bit, trust me, they disappear fast . Ready to dive deeper? Let’s talk basics.
Understanding the Basics:
What is Puff Pastry?
Okay, quick 101 for anyone new to the flaky goodness party. Puff pastry is what fancy folks call a “laminated dough.” Sounds complex, but the idea is simple: you create super-thin layers of butter trapped between super-thin layers of dough. You fold and roll, fold and roll (it’s a whole process, we actually dug into the secret to puff pastry before!). When it hits the hot oven, the water in the butter turns to steam, dramatically forcing those layers apart and creating that amazing POUF and delicate, flaky texture. It’s basically delicious science!
Making it from scratch? It’s a labor of love, truly. But thank goodness the grocery store freezer aisle exists! Good quality store-bought puff pastry is a fantastic shortcut, giving you all that flaky goodness without dedicating an entire afternoon to wrestling with butter. Absolutely no judgment here – I use it all the time for quick wins like these Nutella puffs. And knowing the difference between puff pastry and Danish pastry helps you know when to reach for this flaky magic versus something richer.
Puff pastry is amazing because it swings both ways – sweet and savory. Think turnovers, pot pie tops, fancy appetizers… it’s a real kitchen MVP. For our Nutella Pastry Puff dreams, it’s the perfect crispy, buttery envelope for that hazelnut treasure inside.
Why Nutella is Perfect for Baking
Nutella isn’t just for emergency spoonfuls straight from the jar, amici (though, let’s be real, it excels at that too!). It’s a total rockstar in the baking world! Why? Its creamy texture holds up beautifully when heated, melting into this luscious, dreamy filling without getting weird or separating like some fillings can. Plus, that iconic chocolate-hazelnut flavor? It just sings when it’s baked into things. There’s a reason people ask if Nutella is bakeable – and the answer is a resounding YES!
That unique flavor profile plays so well with others, too. It loves fruit (hello, banana!), nuts (especially hazelnuts, obviously), even a little sprinkle of sea salt to cut the sweetness. It’s like the friendly kid on the playground – gets along with everyone.
And let’s talk convenience! No chopping chocolate, no fussy ganache. You just scoop it out of the jar. Boom. Done. For busy moms like me (or frankly, anyone who just wants dessert now ), Nutella is a lifesaver. It brings big flavor with zero fuss. Okay, enough gushing, let’s get prepped to make these beauties!
Preparing for the Recipe
Ingredients for Nutella Pastry Puff
You are gonna laugh at how short this list is! To make these dreamy Nutella Pastry Puffs, you basically need:
- Puff Pastry Sheets: One package (usually around 14-17 ounces, check the box!) of good quality, all-butter puff pastry if you can find it. Make sure it’s thawed according to package directions – usually overnight in the fridge is best. Don’t skimp on quality here if you can help it, the butter makes a difference!
- Nutella: The star of the show! About 1/2 cup should be plenty, but hey, who am I to judge? Measure with your heart (within reason, don’t want blowouts!).
- Egg Wash: Just 1 large egg whisked together with 1 tablespoon of water. This is the secret to that gorgeous golden-brown bakery shine.
- Optional Fun Stuff (Go Wild!): Thinly sliced bananas or strawberries? Oh yeah. Chopped toasted hazelnuts or almonds? Absolutely. A little sprinkle of coarse sugar (like Turbinado) before baking for extra crunch? Love it. Powdered sugar for dusting after they cool? Classic! This is where you make ’em yours.
Seriously, that’s pretty much it! See? I told you it was easy peasy. Now grab your tools!
Essential Baking Tools You’ll Need
No need to raid a professional kitchen supply store, promise! Just the basics to make your Nutella puff journey smooth sailing:
- Rolling Pin: Just in case you need to gently even out the pastry thickness.
- Pastry Brush: For applying that all-important egg wash. A silicone one is great – washes up like a dream.
- Sharp Knife or Pizza Cutter: For cutting nice, clean shapes. Honestly, a pizza cutter is surprisingly awesome for this! Less drag means cleaner edges.
- Baking Sheet: Your standard cookie sheet works perfectly. Line it with parchment paper – trust me, it’s your best friend for zero sticking and easy cleanup! Nonna would approve.
- Spoon or Small Offset Spatula: For spreading the Nutella neatly. Or, you know, as neatly as possible when Nutella is involved.
- Cooling Rack: Crucial! Letting your beautiful pastries cool on a rack prevents the dreaded soggy bottom. Air circulation is key!
Got your gear? Perfetto! Let’s talk pastry quality for a sec.
How to Select the Best Puff Pastry
Okay, since the pastry is literally half the equation here, let’s choose wisely! Here’s my quick cheat sheet:
- Frozen is Fine, BUT Butter is Better: Most store-bought puff pastry lives in the freezer aisle, and that’s totally okay! BUT… if you spy an “all-butter” version, grab it! The flavor difference is honestly noticeable – richer, more delicious. Check those ingredients; real butter beats palm oil or shortening every single time in my book.
- Check for Uniformity: Try to pick a package where the sheets look reasonably even in thickness. This helps everything puff up more consistently.
- Read the Label (Worth Repeating!): Seriously, seek out that all-butter goodness if you can. Sometimes specialty stores or even local bakeries sell their own frozen puff pastry – that stuff is usually gold!
- Thaw Like a Pro: Always follow the package directions for thawing – usually it’s best done slowly in the refrigerator overnight. You want the pastry cold but pliable – not warm and floppy (disaster!), and definitely not still frozen in the middle!
Choosing good pastry is like laying a solid foundation. Your Nutella Pastry Puff creations will thank you with maximum flakiness!
How to Properly Store Nutella for Baking
Quick tip on the main event – how you store your Nutella actually matters for easy spreading!
- Pantry is its Pal: Keep that jar of Nutella at room temperature, in a cool, dry spot like your pantry. Direct sunlight is not its friend. This keeps it perfectly smooth and spreadable.
- No Fridge Zone!: Please, I beg you, don’t put Nutella in the refrigerator! It gets rock hard and you’ll practically need a chisel to get it out. Trust me on this one, I learned the hard way.
- Seal the Deal: Make sure that lid is screwed on tight after each use. This keeps it fresh and stops it from absorbing any weird pantry smells (like that onion you forgot about…).
Easy peasy, right? Properly stored Nutella = happy baker = delicious pastries.
Step-by-Step Recipe:
Prepping Your Workstation
Alright, team, let’s get set up for success! A little organization now makes the whole process smoother (and way less messy!). Think like a cooking show host – mise en place, baby!
- Clean Slate: Clear off a nice big section of your counter. Give it a quick wipe-down. Now, lightly – and I mean lightly – dust the surface with flour where you’ll handle the pastry. Too much flour can make the pastry tough.
- Gather Your Troops: Have your rolling pin, knife or pizza cutter, pastry brush, parchment-lined baking sheet, jar of Nutella, thawed puff pastry, and your little bowl of beaten egg wash all within easy reach. No frantic searching mid-process!
- Pastry Temperature Check: Feel your puff pastry. Is it properly thawed – cold but workable? If it feels too warm or soft, slide it onto a plate or tray and pop it back in the fridge for 15-20 minutes. Remember: Cold pastry = happy, puffy pastry.
- Oven Alert!: Preheat that oven to 375°F (190°C). Make sure it’s fully preheated before the pastries go in. That initial blast of heat is crucial for the puff!
Okay, workstation looking sharp? You’re already halfway there! Now for the pastry.
Rolling Out the Puff Pastry
- Handle with Care: Gently unfold your thawed puff pastry sheet(s) onto your lightly floured surface. If it cracks a little along the fold lines, don’t sweat it, just gently press the seam back together.
- Just a Whisper of Flour: Put a tiny sprinkle of flour on top of the pastry and maybe rub a little on your rolling pin to prevent sticking. Key word here is tiny . We don’t want to add extra flour to the dough itself.
- Gentle Does It: Depending on the brand, your pastry sheet might be perfect as is, or you might want to gently roll it out just a tad thinner and larger, maybe to about 1/8-inch thickness. Roll from the center outwards, using light, even pressure. Don’t press down hard – you’ll crush those precious layers!
- Cut to Size: Using your sharp knife or that handy pizza cutter, cut the pastry into your desired shapes. Squares or rectangles (say, 3×3 inches or 3×4 inches) are the easiest for folding into triangles or simple pockets. Try your best to make them all roughly the same size for even baking. Think assembly line!
Nice cutting! Clean edges help the pastry rise beautifully. Now for the fun part… bring on the Nutella!
Spreading the Nutella: Techniques
Time for the star ingredient! Getting that Nutella spread just right is the secret to maximum deliciousness without messy explosions. Here are my tried-and-true Nutella techniques (okay, maybe just common sense tips!):
- Room Temp is Best: Make sure your Nutella is at a nice, easily spreadable room temperature. If your Portland kitchen is a bit chilly (hello, constant rain!), you could gently warm the jar in a bowl of warm water for a few minutes, or just zap the amount you need in the microwave for 5-10 seconds ONLY. Don’t overheat it!
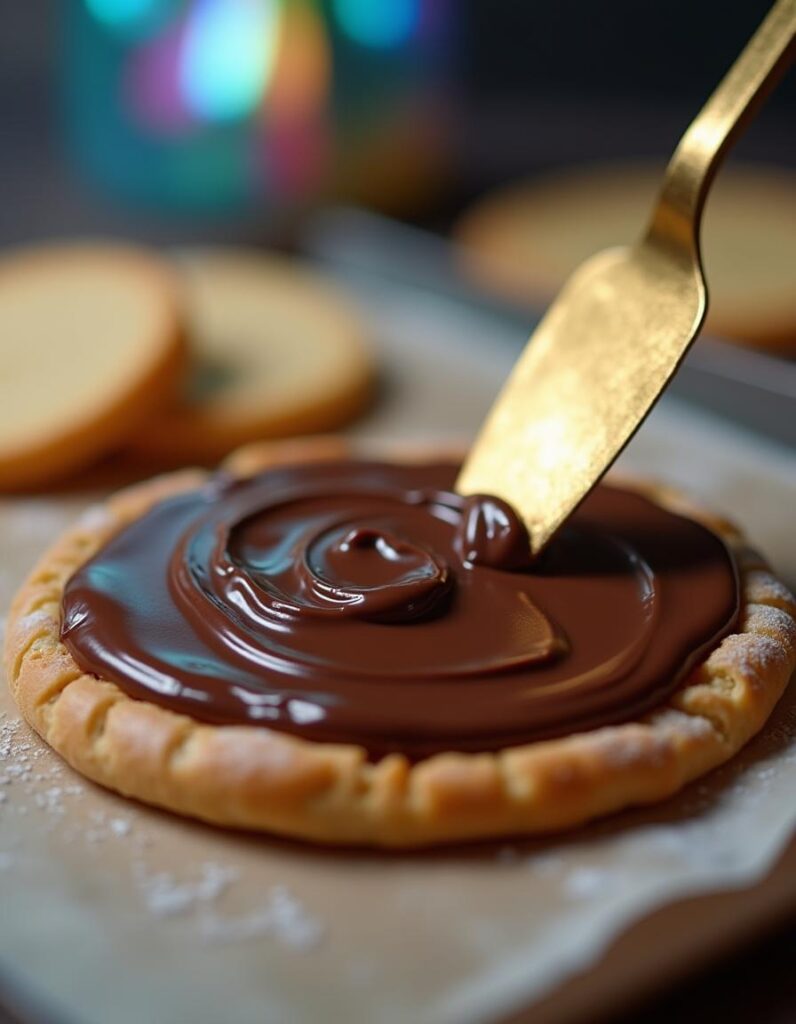
- Target the Center: Plop a spoonful (maybe 1-2 teaspoons per pastry piece, depending on the size you cut) of Nutella smack-dab in the center of one half of your pastry square or rectangle. Use the back of the spoon or that neat little offset spatula to spread it out evenly, BUT – this is important – leave about a 1/2-inch border clean all around the edges. This clean edge is crucial for getting a good seal!
- Resist the Urge to Overfill!: I know, I know, it’s tempting to build a Mount Vesuvius of Nutella in there. But trust me, resist! Too much filling will find a way to ooze out during baking, burn onto your pan, and make a sad, sticky mess (and possibly set off your smoke detector – ask me how I know). A nice, even layer gives you that perfect gooey center without overwhelming the delicate pastry.
Perfect spread! You’re aiming for that beautiful balance of flaky pastry and creamy filling in every single glorious bite.
Folding and Shaping the Pastry
Okay, let’s tuck that Nutella in and get these babies ready for their close-up! This is where they start looking super cute and bakery-worthy.
- Fold and Seal Tightly: Gently fold the plain half of the pastry over the Nutella-covered half. You can make triangles (by folding corner to opposite corner) or keep them as rectangles/squares (folding edge to edge). Now, press the edges together firmly with your fingertips to seal. For extra insurance against leaks (and a pretty finish!), grab a fork and gently crimp all along the sealed edges. This helps stick the layers together.
- Ventilation is Key: Use the tip of your sharp knife to cut 2 or 3 small slits in the top of each pastry. This isn’t just for looks; it allows steam to escape during baking so your puffs don’t burst open in weird places. It’s like little chimneys! Some folks wonder if you should pre-bake puff pastry, but for these filled treats, sealing and venting before baking is the way to go.
- Get Fancy (Optional!): Feeling ambitious? You could cut the pastry into long strips, spread a thin line of Nutella down the center of one, top with another strip, seal the edges, and then gently twist ’em up! Or use small cookie cutters to make fun shapes (just make sure you can still seal the edges well!).
- Consistency is Queen: Again, try to make your folded shapes and sizes pretty uniform. This helps them all bake evenly in the same amount of time. Nobody wants one burnt puff and one sadly underbaked one!
Look at those perfect little packets of potential deliciousness! They’re almost ready for the oven. If you find yourself with extra puff pastry, maybe think about whipping up some Lazy Girl Pecan Pie Bars later – another easy win!
Nutella Pastry Puff Recipe Guide
Ingredients
- Puff Pastry Sheets pre-made, thawed
- Nutella
- 1 Egg beaten with 1 tbsp water (for egg wash)
- Optional: Sliced fruits bananas, strawberries, etc, chopped nuts (hazelnuts, almonds, etc.), powdered sugar
Instructions
- Prep Workstation: Lightly flour a clean, flat surface. Organize all tools and ingredients. Thaw puff pastry if frozen. Preheat oven to 375°F (190°C).
- Roll Out Puff Pastry: Gently unroll the pastry on the floured surface. Roll it out to a uniform thickness of about 1/8 inch. Cut into desired shapes (squares, rectangles, circles).
- Spread Nutella: Spoon a small amount of Nutella in the center of each pastry shape. Spread it evenly, leaving about 1/2 inch space around the edges.
- Fold and Shape Pastries: Fold the pastry over to create desired shapes (triangles, pockets). Press edges with a fork to seal. Make shallow slits on top for steam to escape.
- Chill Before Baking: Place the pastries in the refrigerator for 10-15 minutes.
- Apply Egg Wash: Brush tops of pastries lightly with egg wash.
- Bake: Place the pastries on a parchment-lined baking tray. Bake at 375°F (190°C) for 20-25 minutes, or until golden brown and puffed.
- Cool: Let the pastries cool on a wire rack.
- Serve: Serve warm, or enjoy at room temperature.
Notes
- Use puff pastry made with real butter for the best flavor.
- Keep Nutella at room temperature for easy spreading.
- Do not overfill pastries with Nutella to avoid leakage.
- Chill pastries before baking for better puffing.
- Brush pastries with egg wash for a glossy finish.
- Make sure the oven is fully preheated before baking.
- Allow proper spacing between the pastries.
- Rotate the baking tray for even browning.
Baking Tips for Perfect Puff Pastries
Okay, into the fiery furnace they go! Baking puff pastry isn’t rocket science, but a few little tricks Nonna taught me ensure maximum puff and that perfect golden-brown finish:
- Give ‘Em a Quick Chill (Optional but Recommended!): If you have a few extra minutes, pop the shaped pastries (already on their parchment-lined tray) into the fridge for 10-15 minutes before baking. This helps the butter stay super cold right until it hits the heat, which encourages an even better, higher puff. Trust me, it works!
- The Magic Egg Wash: Grab your beaten egg mixture and pastry brush. Lightly – key word: lightly – brush the tops of the pastries with the egg wash. Try your very best not to let it drip down the cut sides, as the egg can kind of ‘glue’ the layers together and stop them from puffing up as much on the edges. This step is what gives that gorgeous, professional-looking shine!
- Parchment Paper Power: Did I mention lining your baking sheet with parchment paper yet? Yes? Good. Just making sure! It prevents sticking like a champ and makes cleanup ridiculously easy. Nonna always said, “Work smart, not hard!”
- Center Stage for Baking: Place the baking sheet right in the middle rack of your fully preheated oven. This spot usually gets the most even heat circulation.
- Patience, My Friend: Bake at 375°F (190°C) for about 20-25 minutes, but keep an eye on them! You’re looking for beautifully puffed up pastries that are a deep, gorgeous golden brown all over. Resist the urge to peek by opening the oven door every two minutes, especially early on! Let that hot air work its magic.
Follow these little pointers, and you’ll be pulling out perfectly puffed, golden treasures. The smell wafting from your oven? Absolutely heavenly!
How to Ensure Even Cooking
Want every single Nutella Pastry Puff to be cooked to perfection? No soggy bottoms or burnt edges allowed in this kitchen! Here’s how to nail that even bake:
- Fully Preheated Oven is Non-Negotiable: I know, I sound like a broken record, but make absolutely SURE that oven is fully up to temperature before the pastries go in. That initial intense heat is what kickstarts the puffing action.
- Size Does Matter Here: Remember when we tried to cut all the pastry pieces roughly the same size? This is exactly why! Uniform pieces tend to bake at a more uniform rate.
- Give Them Personal Space: Don’t crowd the pastries onto the baking sheet like they’re waiting for a bus in the rain. Leave at least an inch or so between each one. This allows the hot air to circulate freely all around them, ensuring crisp edges and even browning.
- Know Thy Oven (and Rotate if Needed!): Most home ovens have hot spots – areas that cook faster than others. Keep an eye on your puffs. If you notice the ones in the back are browning much faster than the ones in the front, carefully (use oven mitts!) rotate the baking sheet 180 degrees halfway through the baking time.
- Check the Undercarriage: Towards the end of the baking time, gently lift one of the puffs with a thin spatula and take a peek underneath. You want the bottom to be golden brown and feel firm, not pale and soft. If the tops are brown but the bottoms are lagging, you might need a few more minutes.
These little checks and balances guarantee that every puff is cooked through perfectly – crispy, golden, and utterly delicious!
Creative Variations:
Adding Fruits or Nuts to Your Pastry
Okay, Nutella is undeniably amazing flying solo, but why not get a little creative? Adding fruits or nuts is super easy and introduces fantastic extra layers of flavor and texture.
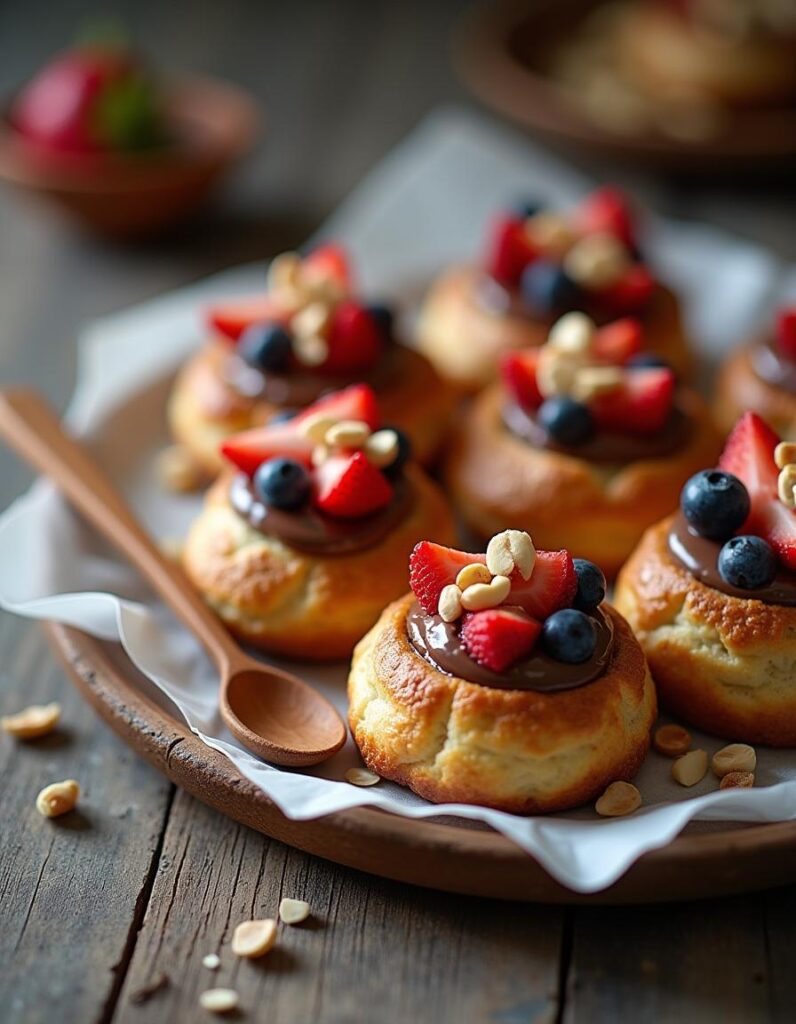
- Fruity Fun Times: Thinly sliced bananas are a classic soulmate for Nutella! A few slices tucked in before folding? Chef’s kiss . Fresh strawberries or raspberries are also incredible – their slight tartness cuts through the richness of the Nutella beautifully. Just layer a few slices or berries right on top of the Nutella before you fold the pastry over. Maybe a tiny sprinkle of cinnamon with the banana? Delizioso!
- Go Nuts (Literally!): Chopped hazelnuts are a natural fit (double hazelnut power!), but toasted almonds or pecans add a wonderful crunchy contrast too. Quick tip: Toasting the nuts briefly in a dry skillet or the oven beforehand really wakes up their flavor. Sprinkle them generously over the Nutella before folding.
- Combine and Conquer: Banana slices AND toasted hazelnuts? Strawberry pieces AND slivered almonds? Yes, please! Don’t be afraid to mix and match. These little additions make each puff feel extra special and personalized.
Trying Different Spreads
While Nutella holds a special place in my Italian-American heart, let’s be real: puff pastry is basically a blank canvas begging for deliciousness! Feel free to experiment if you happen to be out of Nutella (gasp!) or just feel like trying something new.
- Peanut Butter Passion: Creamy or crunchy peanut butter makes a fantastic filling. Maybe toss in a few mini chocolate chips before sealing? Hello, easy PB & Chocolate Puffs!
- Almond Butter Bliss: Almond butter is another great option. How about adding a sprinkle of shredded coconut and maybe some chocolate chips too? Kind of like an Almond Joy vibe!
- Jam Session Surprise: Your favorite fruit jam or preserves – strawberry, apricot, raspberry – works wonderfully. For a slightly tangy twist, add a tiny dollop of cream cheese along with the jam before folding. Boom, instant mini Danish vibes!
- Pure Chocoholic Indulgence: How about simply tucking a square or two of good quality dark or milk chocolate inside? Or maybe you have some leftover chocolate ganache lurking in the fridge? Mamma mia, that would be divine!
Don’t be afraid to play pantry wizard! You might just stumble upon your next obsession.
Turning It into a Dessert Board
Want to seriously impress your guests (or just make Friday night extra special for the family)? Turn these easy Nutella Pastry Puffs into the star of a dessert board! It looks amazing, is super fun, and feels incredibly decadent.
- Pastry Pile-Up Power: Arrange your warm, golden Nutella puffs invitingly on a large wooden board, slate platter, or even just a big serving plate. Don’t just dump ’em – nestle them artfully!
- Dip It Real Good: Add small bowls of yummy extras for dipping. Think slightly warmed Nutella (obviously!), maybe some salted caramel sauce, a vibrant raspberry coulis (easy to make or buy!), or even melted white chocolate.
- Fresh & Fruity Contrast: Scatter around plenty of fresh berries (strawberries, blueberries, raspberries), sliced kiwi, juicy orange segments, or even some green grapes. They add beautiful color, freshness, and a nice counterpoint to the richness.
- Bonus Treats & Fillers: Fill in the gaps on the board with other fun bits! Mini marshmallows, small cookies (like crunchy biscotti or simple shortbread), chocolate shavings, candied nuts, or even little pretzels for a salty kick.
It looks like a million bucks, tastes incredible, and lets everyone customize their own perfect bite. Talk about a party pleaser! If you’re looking for more easy recipes that wow a crowd, you might find some inspiration checking out these Creative Recipes for Every Occasion – sometimes the simplest ideas are the biggest hits!
Troubleshooting Tips
Common Mistakes and How to Avoid Them
Hey, listen, even experienced home cooks (like yours truly!) have off days in the kitchen. Sometimes things go a little… wonky. Don’t stress! Here are the most common pitfalls with Nutella puffs and how to sidestep ’em:
- The Dreaded Pastry Flop (Over-Thawed & Warm): If your puff pastry gets too warm and starts feeling limp or sticky, it becomes a nightmare to work with and, more importantly, it won’t puff up nearly as well. Solution: Keep that pastry COLD! Work relatively quickly. If it starts feeling floppy or greasy, don’t fight it – slide it onto a parchment-lined tray and pop it back into the fridge for 15-20 minutes to chill out and firm up again.
- The Great Nutella Escape (Overfilling & Poor Sealing): More is NOT always more when it comes to filling puff pastry! Packing in too much Nutella is the #1 cause of leaky, burnt puddles on your baking sheet. Solution: Stick to that modest, even layer of Nutella, leaving that clean 1/2-inch border. And make sure you seal those edges TIGHTLY, first with your fingers, then reinforcing with that fork crimp.
- Pale & Interesting (Skipping the Egg Wash): That simple egg wash does more than just make your pastries look pretty and shiny; it significantly helps with browning and also adds another layer of sealing power. Solution: Don’t skip it! Seriously, whisk that egg and water together and give the tops a light brush. Your puffs will look much more appealing (and less sadly anemic) for it.
- Huddled Masses Yearning to Puff (Crowding the Pan): Give your beautiful pastries room to breathe and expand! If they’re jammed too close together on the baking sheet, they’ll end up steaming each other instead of getting crispy all around, and the sides won’t brown nicely. Solution: Space ’em out! Leave at least an inch, maybe even an inch and a half, between each puff on the parchment paper. Use two baking sheets if you need to.
Avoid these common oopsies, and you’re pretty much guaranteed gorgeous, flaky, delicious pastries every time. You absolutely got this!
Fixing Overbaked or Undercooked Pastries
Did the timer lie? Did you get distracted by a sudden kitchen dance party? Don’t despair and definitely don’t toss ’em just yet! We might be able to perform a little kitchen triage:
- A Tad Too Toasty (Slightly Overbaked): If they’re looking dark golden brown but aren’t actually burnt to a crisp, you can often salvage the situation. Let them cool slightly first. A generous dusting of powdered sugar works wonders to camouflage slightly uneven browning! Or, if they seem a bit dry, you could try brushing them VERY lightly with a simple syrup (just equal parts sugar and hot water, stirred until dissolved and cooled) to add back a touch of moisture and shine.
- Still a Bit Doughy Inside (Undercooked): If the tops look perfectly golden but the insides or, more likely, the bottoms still seem pale, soft, or doughy, your oven might be running a bit hot, browning the outside too quickly. Solution: Try loosely tenting the pastries with a piece of aluminum foil (shiny side out) to prevent the tops from getting any darker. Then, lower the oven temperature by about 25°F (around 15°C) and continue baking for another 5-10 minutes, checking frequently, until they are cooked through and the bottoms are firm and golden.
- Patchy Tan Lines (Uneven Cooking): This usually happens because of uneven pastry thickness when rolling, inconsistent shaping, or those sneaky oven hot spots. Solution for next time: Try to be more consistent with size/thickness and remember to rotate that pan! Solution for this batch: Hey, nobody’s perfect! Just serve the best-looking ones first and strategically arrange the others. They’ll still taste amazing! 😉
Sometimes a little creative thinking (and maybe some powdered sugar) is all you need!
Making Puff Pastry Fluffier
Want maximum POUF? We’re talking sky-high, shatteringly flaky layers that make people gasp? Here are the secrets whispered down from generations of bakers (and my Nonna!) for achieving ultimate puff pastry fluffiness:
- COLD, COLD, COLD is Key!: Yes, I’m saying it again because it’s THAT important! Cold butter hitting a hot oven creates steam, and steam creates puff. Keep your pastry thoroughly chilled right up until the moment it goes into the oven. As food science experts like those at Serious Eats confirm, cold ingredients are absolutely vital for creating those distinct flaky layers. Handle the dough as little as possible, especially with warm hands.
- Blast Furnace Heat (Okay, Just a Hot Oven!): Make absolutely certain that your oven is fully preheated to the recipe temperature (usually 375°F or even 400°F – check your pastry package instructions too). That initial blast of high heat is what shocks the butter into releasing its steam rapidly, creating the dramatic lift.
- Use Flour Power Sparingly!: Remember that light dusting of flour on your work surface? Keep it light! Too much excess flour can get worked into the dough as you handle it, making it heavier and potentially hindering the rise. Brush off any excess flour before folding and shaping.
- Chill Out After Shaping (Seriously!): That optional 10-15 minute rest in the refrigerator after you’ve filled and shaped the pastries? It really does make a difference! It allows the gluten in the dough to relax slightly and, more importantly, ensures the butter is nice and firm again before baking, leading to a better structure and rise.
- A Feather-Light Touch: Be gentle throughout the process – when rolling (if needed), cutting, filling, and shaping. Don’t press down hard with the rolling pin, use a sharp cutter for clean edges, and avoid squashing those delicate layers you’re trying so hard to encourage!
Follow these little secrets, and you’ll be rewarded with pastries so light and flaky, they practically float off the plate! Pure baking magic.
Serving Suggestions:
Best Pairings for Nutella Pastry Puff
These Nutella puffs are honestly spectacular straight off the cooling rack, but serving them with a little something extra? That takes them from delicious to downright divine!
- Fresh Berry Bonanza: A handful of fresh strawberries (sliced or whole), juicy raspberries, or plump blueberries alongside is my absolute favorite. Their bright, slightly tart flavor cuts through the richness of the Nutella and pastry perfectly. Plus, the colors look stunning together!
- Creamy Dreamy Companions: Oh, Mamma mia! A generous dollop of lightly sweetened whipped cream (maybe with a tiny splash of vanilla extract) or a scoop of good quality vanilla bean ice cream slowly melting next to a warm puff? That’s pure, unadulterated bliss right there.
- Perfect Coffee Companions: For breakfast or brunch, a strong cup of espresso, a frothy cappuccino, or even just a mug of your favorite drip coffee is a classic and perfect pairing. Or lean into the cozy factor with a mug of rich hot chocolate!
- Double Down on Nutella (Go On, I Won’t Tell!): Serve a tiny bowl of slightly warmed Nutella on the side for extra dipping action. Because honestly, can you ever really have too much Nutella? I think not!
Mix and match, or just enjoy them plain! Any of these pairings will make your lovely Nutella Pastry Puff feel even more like a special treat.
Presentation Tips for Special Occasions
Bringing these flaky beauties to a potluck, serving them for a special brunch, or just want to make dessert feel a bit more extra ? Let’s make ’em look as fabulous as they taste:
- Choose Your Stage Wisely: Arrange the cooled (or still slightly warm) pastries on your prettiest platter, a rustic wooden cutting board, or even a simple white plate. Don’t just pile them up – overlap them slightly, maybe arrange them in a circle or a cascading line. Presentation matters!
- Level Up with Garnishes: A generous dusting of powdered sugar right before serving is simple, elegant, and always looks lovely. Want more drama? A drizzle of melted dark or white chocolate across the tops looks fantastic. A few fresh mint sprigs tucked amongst the pastries add a pop of color and freshness. Instant fancy!
- Serve Them Warm (Ideally!): Puff pastry, especially filled pastry, really shines when it’s slightly warm – the pastry is crispier, the filling is gooier. If you need to make them slightly ahead, you can keep them loosely covered with foil in a very low oven (like 200°F or 95°C) for a short time until ready to serve. Just don’t let them sit too long, or they might dry out.
- Label with Love: If you made a variety (some plain, some with banana, some with nuts), little handwritten labels stuck into the pastries with toothpicks are a super cute and helpful touch, especially if you’re serving guests with potential allergies or preferences.
Taking a minute or two for presentation really elevates the experience. It shows your guests (or just your family!) that you put in that extra bit of love and care. That’s the Italian way!
Storing and Reheating Leftovers
Leftover Nutella Pastry Puffs? Is that… is that even possible? Okay, okay, on the off chance you possess superhuman willpower and do have some extras hanging around, here’s the best way to handle them:
- Storing Smart: First things first, let the pastries cool COMPLETELY on a wire rack before even thinking about storing them. Trapped heat = condensation = soggy pastry = sad baker. Once totally cool, place them in an airtight container. They’re best enjoyed within a day or two at room temperature for maximum crispness. If you need to keep them longer, you can put them in the fridge, but be warned, the pastry might lose some of its delightful flakiness.
- Reheating for Revival: The absolute best way to bring back some of that glorious flaky texture is to reheat them gently in an oven or a toaster oven! Preheat it to around 350°F (175°C). Place the leftover puffs directly on the rack or on a baking sheet and warm them for about 5-7 minutes, just until they’re heated through and the pastry has re-crisped. Please, for the love of all things delicious and flaky, resist the siren call of the microwave! It will turn your beautiful puff pastry into a sad, chewy, soggy shadow of its former self. Just don’t do it!
A quick trip back into the oven and they’re almost as good as freshly baked! Perfect for rescuing breakfast the next day or for a sneaky midnight snack attack.
Frequently Asked Questions (FAQ)
Got questions swirling around like steam from fresh puff pastry? Chances are, I’ve asked them myself at some point! Here are answers to a few common queries about making these Nutella delights:
Can I make Nutella Pastry Puff ahead of time?
You betcha! You’ve got a couple of options here. You can assemble the pastries completely (fill, fold, seal, vent ’em!), place them on the parchment-lined baking sheet, cover them tightly with plastic wrap, and refrigerate for up to 24 hours before baking. Just add the egg wash right before they go into the oven! Alternatively, you can bake them completely, let them cool, store them as mentioned above, and then reheat briefly before serving. They are definitely best fresh and warm, but prepping ahead is totally doable for busy schedules!
How do I store leftover Nutella Pastry Puff?
Okay, first, let those babies cool down COMPLETELY on a wire rack – seriously, no cheating! Trapped steam is the enemy of crispiness. Once they’re cool as a cucumber, pop them into an airtight container. They’ll keep reasonably well at room temperature for about 1-2 days. Any longer than that, the fridge is your next best bet, but expect some loss of that perfect flaky texture.
Can I freeze this recipe?
Mamma mia, yes! Freezing is a fantastic option. You can freeze them either unbaked or baked. To freeze unbaked: Assemble the pastries fully (but don’t add the egg wash yet), place them on a baking sheet in a single layer, and freeze until solid (about 1-2 hours). Then transfer the frozen pastries to a freezer-safe bag or container. They’ll keep for up to 2-3 months. Bake directly from frozen (no thawing needed!), adding the egg wash just before baking – you’ll likely need to add a few extra minutes to the baking time. To freeze baked: Let the baked pastries cool completely, then wrap them individually or place them in an airtight freezer container. They’ll keep for about a month. Thaw at room temperature and reheat in the oven (as described above) to restore crispness.
What if I don’t have Nutella?
No Nutella in the house? Don’t panic, my friend! Your pantry magic can save the day. As we chatted about in the variations section, puff pastry is super versatile. You can absolutely swap in other spreads! Creamy peanut butter (maybe with mini chocolate chips?), almond butter, your favorite fruit jam or preserves (strawberry or apricot are great!), cookie butter (like Biscoff), or even just tucking a few squares of good quality chocolate inside before sealing works beautifully. Get creative – you might discover a new favorite combo!
Conclusion
So there you have it, amici! Simple, elegant, ridiculously delicious Nutella Pastry Puff pockets of pure joy, ready to rescue any snack time, dessert craving, or chaotic morning. They’re proof that you don’t need complicated techniques or fancy ingredients to make something truly special.
Go on, give this recipe a whirl! Preheat that oven, crank up some Sinatra (or whatever gets your kitchen dance party started!), grab your trusty jar of Nutella, and treat yourself. That first bite – the shatter of flaky pastry giving way to warm, gooey, chocolate-hazelnut heaven? That’s what Nonna always called cooking with love. And trust me, you’ll absolutely nail it.
Remember, baking should be fun, a joyful act, not a stressful chore! These Nutella puffs are wonderfully forgiving. Don’t be scared to try adding those banana slices or toasted nuts, or even if your shapes come out a little wonky – imperfection is part of the charm, and they’ll still taste incredible.
I truly hope these little pockets of happiness bring as much joy to your table as they regularly do to mine (where my picky-eater son and my chatty little kitchen helper devour them before they even fully cool!). I’d love to hear how yours turn out! Did you try any fun variations? Drop your stories, questions, or genius twists in the comments below – let’s keep the delicious conversation going. Sharing is caring, right? Buon appetito, my friends!

