Hey there, fellow foodies! Okay, first things first: have you ever met a Gipfeli Recipe? If not, Mamma mia, you are in for such a treat! Think of it like the croissant’s charming Swiss cousin – maybe a little less famous, but every bit as delicious. My kids love croissants, but when I discovered these buttery, flaky pastries, it was a whole new world! They’re a huge deal in Switzerland, and trust me, that first bite tells you exactly why. Making them isn’t just baking; it feels like creating a little piece of edible happiness. My husband keeps asking if they’re “just Swiss croissants” (bless his heart), but nope! I’m here to walk you through making your own batch, step-by-step, so you can bring that cozy Swiss vibe right into your own kitchen. Honestly, pulling these golden beauties out of the oven? So rewarding!
History and Origins of Gipfeli
Now, Gipfeli aren’t just whipped up out of thin air; they’ve got history, soul! These pastries are woven into the fabric of Swiss food culture. Just picture those adorable bakeries tucked away in Swiss towns, the air thick with the amazing smell of fresh bread and these golden crescents. Nonna always said food tells a story, and Gipfeli definitely do. They’re an everyday thing in Switzerland – enjoyed with morning coffee, as an afternoon pick-me-up, you name it. The recipes have been lovingly passed down, tweaked, and perfected over generations, but always keeping that core buttery goodness. It’s that tradition and evolution that make them so special.
Ingredients for Gipfeli
Alright, let’s raid the pantry (or write a shopping list!). What magic ingredients do we need for these Swiss delights? Don’t worry, nothing too crazy here. It’s mostly baking staples. Here’s what you’ll need, plus my two cents on picking the good stuff:
Essential Ingredients:
- Pastry Flour: About 500 grams (around 4 cups). Why pastry flour? It has a lower protein content than bread flour, which helps give pastries like these a tender, delicate crumb. Perfect for that melt-in-your-mouth feel!
- Butter: 250 grams (about 1 cup + 1 tbsp, or 2 sticks plus 1 tbsp). The star of the show! Use good quality, unsalted butter. Cold, cold, cold!
- Dry Yeast: Around 7 grams (about 2 ¼ teaspoons) OR 20 grams fresh yeast. This little powerhouse makes our dough rise and get all lovely and airy.
- Water: About 250 ml (about 1 cup + 1 tbsp). Make sure it’s lukewarm – like a comfy bath, not too hot, not too cold – to wake up that yeast gently.
- Salt: A teaspoon. Never underestimate salt in baking! It balances the sweetness and brings out all the yummy flavours.
- Sugar: About 30 grams (around 2 ½ tablespoons). Just a little bit to give the Gipfeli its characteristic subtle sweetness and feed the yeast.
- Egg: One large egg, for brushing on top to get that gorgeous golden, shiny finish. Va-va-voom!
Tips for Ingredient Selection:
- Butter: Seriously, use the good stuff if you can! European-style butter with higher fat content (like 82%+) is fantastic for creating flaky layers. It’s less watery and more flavorful. This is key for the secret to good croissant-like pastries!
- Flour: If pastry flour is hiding from you at the store, all-purpose flour will work in a pinch. The texture might just be slightly less delicate, but still delicious!
- Yeast: Finally, double-check that expiration date! Old yeast = sad, flat Gipfeli. We want happy, active yeast ready to party!
Step-by-Step Gipfeli Recipe
Okay, now, let’s get those hands messy! Put on some music, pour yourself something nice, and let’s bake some magic.
Preparing the Dough
- Wake Up the Yeast: In a small bowl, combine the lukewarm water, sugar, and yeast. Give it a gentle swirl and let it hang out for 5-10 minutes. You’re looking for it to get bubbly and foamy – that’s the sign your yeast is alive and ready to work its magic!
- Mix the Dry Stuff: In your big mixing bowl, whisk together the flour and salt. Get ’em nice and combined.
- Bring it Together: Pour that lovely foamy yeast mixture into the flour bowl. Start mixing (with a wooden spoon, your hands, or a mixer on low) until a shaggy dough forms. Don’t expect perfection yet!
- Knead it Out: Tip the dough onto a lightly floured counter and knead away for about 5-7 minutes. You want it to go from shaggy to smooth and slightly elastic. Put some love into it! Think of it as a mini arm workout with a delicious reward.
- Let it Rise (First Proof): Pop the dough into a lightly oiled bowl, turn it over once to coat, cover the bowl (plastic wrap or a clean kitchen towel works), and let it rise in a warmish spot for about an hour, or until it’s roughly doubled in size. This is where the flavour starts developing!
Laminating the Dough
- Prep the Butter Block: While the dough rises, let’s shape the butter. Place your cold butter between two sheets of parchment paper and gently bash it with a rolling pin (great stress reliever!) then roll it into a rough square or rectangle, about ½ inch thick. You want it pliable but still cold. Pop it back in the fridge if it gets too soft.
- Roll Out Dough: Once the dough has risen, gently punch it down (deflate it). On a lightly floured surface, roll it into a rectangle that’s roughly twice the size of your butter block.
- Encase the Butter: Place your chilled butter block in the center of the dough rectangle. Fold the dough flaps over the butter like an envelope, making sure to seal the edges well. No butter peeking out!
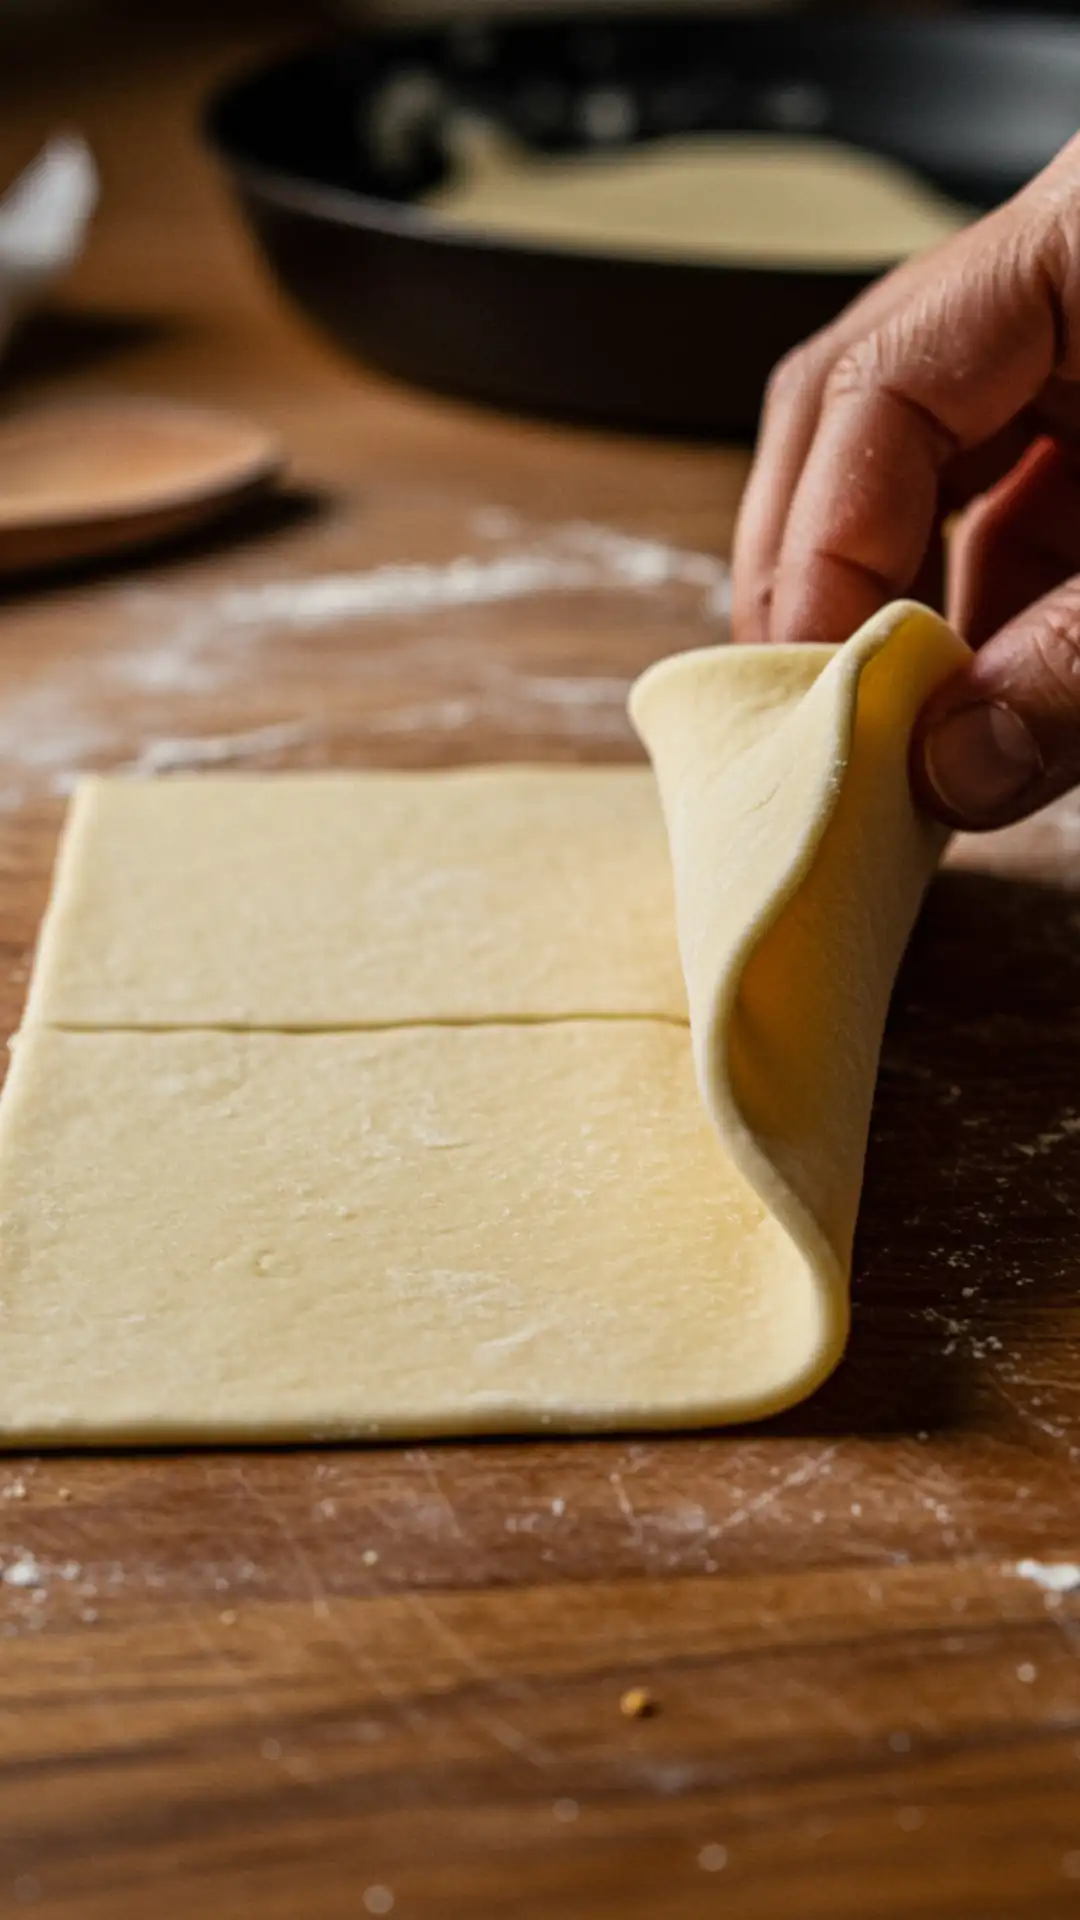
- The First Turn (Fold): Carefully roll the dough package into a long rectangle. Then, perform a “letter fold” (or “single fold”): imagine the rectangle divided into thirds; fold the bottom third up, then the top third down over it. Congrats, you’ve done the first turn! This starts creating those layers.
- Mandatory Chill Time: Wrap the folded dough tightly in plastic wrap and chill it in the fridge for at least 30 minutes. This lets the gluten relax and keeps the butter firm. Don’t skip this! Go grab that coffee now.
- Repeat Turns & Chills: Repeat the process – roll into a rectangle, fold into thirds, wrap, and chill – two more times. So you’ll do a total of 3 turns, with 30 minutes of chilling after each one. Yes, it takes time, but this is the secret to flakiness!
Shaping the Gipfeli
- Final Roll-Out: After the last chill, roll the dough out one last time on a lightly floured surface into a large rectangle, about ¼ inch thick. Try to keep it even!
- Cut Those Triangles: Using a pizza cutter or sharp knife, cut the rectangle into long, skinny triangles. A typical base width might be around 3-4 inches.
- Roll ‘Em Up!: Make a small slit (about ½ inch) in the center of the base of each triangle. Gently stretch the two base corners outwards slightly. Starting from the base, roll the triangle up towards the point, not too tightly, not too loosely. Curve the ends gently towards each other to make that classic crescent shape. Place them on your prepared baking sheet.
Baking Tips
- Second Rise (Proofing): Cover the shaped Gipfeli loosely with plastic wrap and let them rise in a warmish place for about 45-60 minutes, or until they look puffy and have increased in size (maybe not quite doubled, but noticeably bigger).
- Get Golden: Gently whisk the egg with a tablespoon of water. Carefully brush this egg wash over the risen Gipfeli. This step is crucial for that beautiful, shiny, golden-brown colour!
- Preheat Like You Mean It: Make sure your oven is fully preheated to 390°F (200°C). A hot oven helps the Gipfeli puff up quickly.
- Bake Time!: Bake for about 15-20 minutes. Keep an eye on them! You’re looking for a deep golden brown colour and flaky appearance. Ovens vary, so trust your eyes (and nose!).
- Cool Down: Carefully transfer the baked Gipfeli to a wire rack to cool. I know, the smell is torture, but letting them cool slightly prevents a soggy bottom and lets the structure set. The wait is hard, but worth it!
Gipfeli Recipe Pro Tips
Want to level up your Gipfeli game? Let’s avoid those common uh-oh moments and aim for pastry perfection. These tips are my go-tos!
Common Mistakes to Avoid:
- Proofing Problems: Letting the shaped Gipfeli rise for too long (over-proofing) makes them delicate and prone to collapsing in the oven. Not letting them rise enough (under-proofing) results in dense, heavy pastries. Watch for that puffy, jiggly sweet spot!
- Uneven Layers = Uneven Bake: Try really hard to roll the dough evenly during lamination. If some parts are thicker than others, the layers won’t be consistent, and they might bake unevenly.
- Butter Breakout!: If your butter gets too soft or warm during the process, it can melt into the dough instead of staying as separate layers. This leads to greasy spots and less flakiness. Keep things cool! If you want more details, check out common mistakes in making croissants (similar principles apply!).
Secrets to Perfect Layers:
- Chill Out: I can’t stress this enough! Cold butter, cold dough, and those crucial chilling times between turns are non-negotiable for distinct layers.
- Gentle Giant: Be firm enough to roll the dough, but gentle enough not to tear it or squish the layers together. Think finesse, not force!
- Know When to Stop Folding: Three turns is usually perfect for Gipfeli. Overdoing the folds can actually make the layers too thin and the dough tough. Trust the process!
Variations of Gipfeli
Got the basic Gipfeli mastered? Feeling like playing? Mamma mia, let’s have some fun! There are tons of ways to jazz these up.
If you’re looking for a specific variation like Mandelgipfel (Almond Gipfeli), Helvetic Kitchen has a great resource.
Sweet Variations
Savory Variations
Serving Suggestions
You baked these beauties, now how to best enjoy them? So many delicious ways!
Traditional Pairings
Modern Takes
Storage and Reheating Tips
What if – gasp! – you have leftovers? Or maybe you’re a smart cookie baking ahead? Here’s how to keep them tasting great.
Keeping Gipfeli Fresh
Reheating for Maximum Freshness
Nutritional Information
Okay, let’s briefly touch on the nutrition side. We know they’re a treat, but it’s good to have an idea!
Health Benefits of Ingredients
Calorie Breakdown
Homemade Swiss Gipfeli
Equipment
- Small bowl
- Large bowl
- Lightly oiled bowl
- Lightly floured surface
- Rolling Pin
- Pizza cutter or knife
- Baking sheet
- Parchment paper
- Wire rack
Ingredients
- 500 grams Pastry Flour
- 250 grams Butter good quality, high fat content
- 7 grams Dry Yeast or 20 grams of fresh yeast
- 250 ml Lukewarm Water
- 1 teaspoon Salt
- 30 grams Sugar
- 1 Egg for the shiny, golden glaze
Instructions
- Activate the Yeast: In a small bowl, mix the lukewarm water with the sugar and yeast. Give it a little stir and let it sit for about 5-10 minutes, until it gets nice and foamy. This means that our yeast is alive, kicking, and ready to do its job!
- Mix the Dry Ingredients: In a large bowl, mix the flour and salt together, ensuring they’re evenly combined.
- Combine Wet and Dry: Add the foamy yeast mixture to the flour. Mix it all together, until it forms a shaggy dough. Don’t worry if it’s not perfect at this stage.
- Knead the Dough: Turn the dough onto a lightly floured surface and knead for about 5-7 minutes, until it’s nice and smooth. It should have a slightly elastic feel to it.
- First Rise: Place the dough in a lightly oiled bowl, cover it, and let it rise for an hour, or until it doubles in size. This part is absolutely crucial; it’s where the magic starts to happen!
- Prepare the Butter: Take your butter out of the fridge and let it soften just a bit, but definitely don’t let it get too melty; you want it to be pliable!
- Roll the Dough: Once the dough has doubled in size, gently punch it down to release the air. Roll it into a rectangle, about 1/2 inch thick, making sure it’s an even thickness.
- Add the Butter: Place the softened butter in the center of the dough and fold the sides over the butter, like you’re wrapping a present. Make sure the butter is completely enclosed.
- The First Turn: Roll out the dough again into a rectangle, then fold it in thirds, like folding a letter. This is our first “turn.” This is essential for creating those buttery layers that we all love.
- The Chill: Wrap the dough and put it in the fridge for 30 minutes to let the butter get firm. This is a necessary step to prevent the butter from melting.
- Repeat: Do 2 more turns, chilling the dough for 30 minutes each time in between. Patience is key, because this step is crucial for the overall texture.
- Roll Out the Dough: Roll the dough into a large rectangle about 1/4 inch thick. Ensure the thickness is consistent to allow for even baking.
- Cut Triangles: Using a pizza cutter or a knife, cut triangles out of the dough. The more even your cuts, the more uniform your Gipfeli will be.
- Shape the Gipfeli: Gently stretch each triangle slightly at the base, then roll it up towards the tip, kind of like you’re making a tiny sleeping bag. Curve the ends into a crescent shape.
- Egg Wash: Whisk your egg with a little water and gently brush it over the Gipfeli. This gives them that beautiful golden shine we all crave.
- Preheat Oven: Preheat your oven to 200°C (390°F). This is an important step to ensure proper baking.
- Bake: Place the Gipfeli on a baking sheet lined with parchment paper. Bake for about 15-20 minutes, or until they’re golden brown and beautifully flaky. It is important to keep a close eye on them, since all ovens are a little different.
- Cool: Let them cool on a wire rack. The wait, undoubtedly, is tough, but totally worth it!
Notes
FAQs
Got questions? I bet you do! Let’s tackle some common Gipfeli queries.
<!– wp:rank-math/faq-block {"questions":[{"id":"faq-question-678997d732b25","visible":true,"title":">Q: What is the difference between a croissant and a gipfeli?>”,”content”:”A: That’s a fantastic question, and it’s one that many people ask! While both are undeniably buttery and flaky, there are indeed key distinctions. Firstly, a Gipfeli tends to have a slightly denser texture compared to the often airier croissant. Secondly, the shaping is often different; Gipfeli usually sport a more defined crescent shape, while croissants may have a more pronounced curve. And finally, their origins differ. Croissants hail from France, whereas Gipfeli are a proud Swiss creation. They’re like close cousins who share similar traits but each have their own unique style and character. In short, think of the Gipfeli as the slightly sturdier, more tightly-coiled cousin to the croissant! Also, the Gipfeli dough has a small amount of sugar added, and often, it’s laminated using a simpler method. check out, for more details.”},{“id”:”faq-question-678997d732b26″,”visible”:true,”title”:”>Q: What is the secret to a good croissant?>”,”content”:”A: Ah, the age-old secret to a perfect croissant! Well, there isn’t just one single secret but rather a combination of techniques and attention to detail. Firstly, using cold ingredients, especially the butter, is paramount. This helps create those distinctive layers. Secondly, the lamination process (folding the dough and butter) must be done carefully and with precision to ensure even layers. Thirdly, adequate chilling time between turns is essential to keep the butter firm. Lastly, don’t rush the proofing and baking; patience is vital for achieving that perfect rise and golden color. And above all, practice makes perfect; the more you bake, the better you’ll become. for more, check out this article.“},{“id”:”faq-question-678997d732b27″,”visible”:true,”title”:”>Q: What is a common mistake in croissants?>”,”content”:”A: That’s a great question, and it’s something that many home bakers struggle with! Indeed, there are a few common pitfalls. The most frequent mistake is not keeping the dough cold enough during the lamination process. If the butter gets too warm, it melts into the dough, which will result in a greasy, heavy pastry instead of a light, flaky one. Another common error is over-proofing the dough. If you allow it to proof for too long, you’ll end up with a flat croissant. Finally, insufficient resting time between lamination turns can also cause problems. So in essence, keep it cold, keep it moving, and don’t overdo it! see more here.“},{“id”:”faq-question-678997d732b28″,”visible”:true,”title”:”>Q: What is the Scottish version of a croissant?>”,”content”:”A: The Scottish take on a croissant is the beloved “Scottish Buttery,” which is also frequently referred to as a “rowie” or an “Aberdeen roll.” This pastry, similar in concept to our Swiss Gipfeli and French croissant, is flaky and buttery, yet it has a more bread-like texture. Also, they’re typically made with lard or a mix of lard and butter for a slightly different flavor profile and a denser texture. It’s a beloved treat in Scotland and worth exploring if you enjoy flaky pastries. So while they all have a similar appeal, they do each bring their own unique qualities to the table. For a detailed , you can refer to this resource >What is the Scottish version of a croissant?>”}],”className”:””,”listStyle”:”div”,”listCssClasses”:””,”itemCssClasses”:””} –><strong>>Q: What is the difference between a croissant and a gipfeli?</strong>>
<strong>>Q: What is the secret to a good croissant?</strong>>
<strong>>Q: What is a common mistake in croissants?</strong>>
<strong>>Q: What is the Scottish version of a croissant?</strong>>
Well, there you have it, friends! We’ve journeyed into the cozy, buttery heart of the Swiss Gipfeli, from its charming history to the steps for making it sparkle in your kitchen. I really hope you feel inspired and maybe even a little bit excited to give this Gipfeli recipe a whirl.
Listen, making laminated dough like this might seem like climbing Mount Hood at first, but trust me, it’s an adventure worth taking! Don’t stress about perfection on the first try. Nonna always said the best lessons (and sometimes the best food!) come from the tries that don’t go quite right. Enjoy the process, the feel of the dough, the amazing smell filling your kitchen. My kids might make a flour angel on the floor, and my husband might sneak bites before they’re cool, but that’s all part of the fun, right?
Remember, baking is love made edible. Sharing these warm, flaky Gipfeli – whether for a lazy Sunday breakfast, a special brunch, or just because you felt like creating something wonderful – is pure joy. It’s a fantastic way to spend your time and treat the people you cherish (including yourself!).
I can’t WAIT to hear about your Gipfeli adventures! Did you try them? Add any fun fillings? Have any questions pop up? Please share everything in the comments below! Let’s build our own little Gipfeli fan club right here. Happy baking, everyone! Buon appetito!

